This is an old revision of the document!
- beagleboneblack
- Jonathan Haack
- Haack's Networking
- netcmnd@jonathanhaack.com
To locate device if auto-mounted
sudo dmesg
umount /dev/mmcblk0p1
Optional: use fdisk to remove the partition first before dding …
sudo dd of=/dev/mmcblk0 if=/home/sexa/Downloads/bone-debian-9.2-iot-armhf-2017-10-10-4gb.img bs=1M conv=fdatasync [or && sync]
After this, pull out SD card. Plug back in. Locate where it mounted, prepare to edit file to allow it to run the installer upon boot. This is located in boot/enV.txt relative to wherever the media mounted. Eg., cd /media/sexa/rootfs/boot/
cmdline=init=/opt/scripts/tools/eMMC/init-eMMC-flasher-v3.sh
Get out of the directory asap. then:
umount /dev/mmcblk0p1
Now that the image has been turned into an installer, you may put the microSD card into the Beagle Bone (without power).
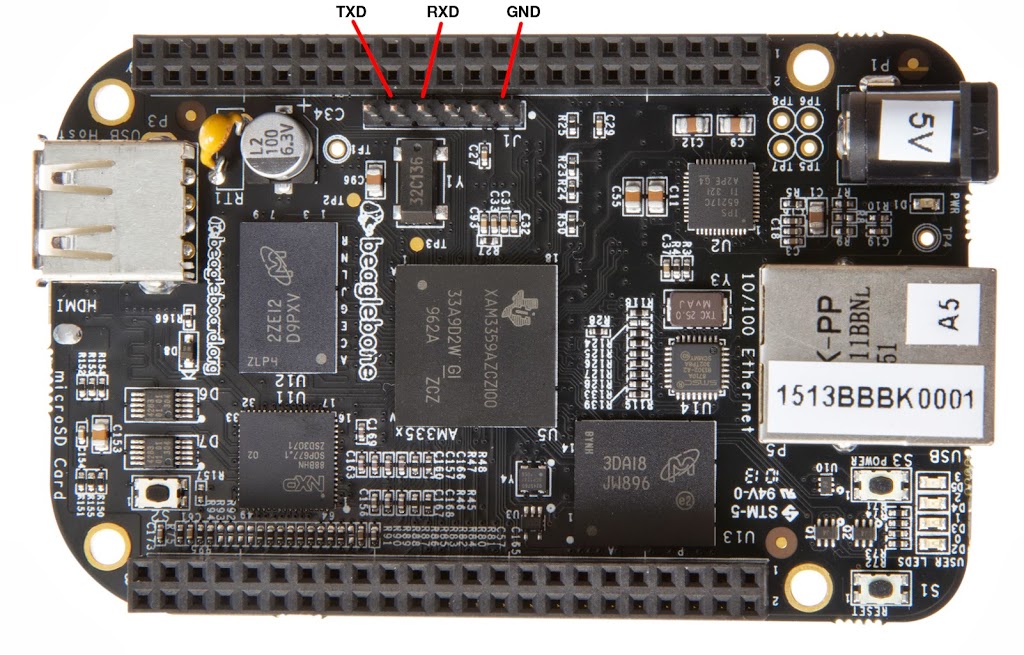
If there is a fourth pin, usually red, do not use. We only need input, output, and ground.
sudo screen <devicename> 115200
sudo screen /dev/ttyUSB0 115200 [Example]
When working with serial connections such as the Beagle Bone Black, and otherwise, screen can be helpful. You can leverage screen with ssh to tunnel to another host, and then pass a screen command to keep the commands you initiate persistent on the client you connected to.
ssh -p ### -t user@host.com screen -DRO
Using screen with usb to serial adapter
sudo screen /dev/ttyUSB0 115200
Some other common speeds are 9600, 57600, 38400, 19200


